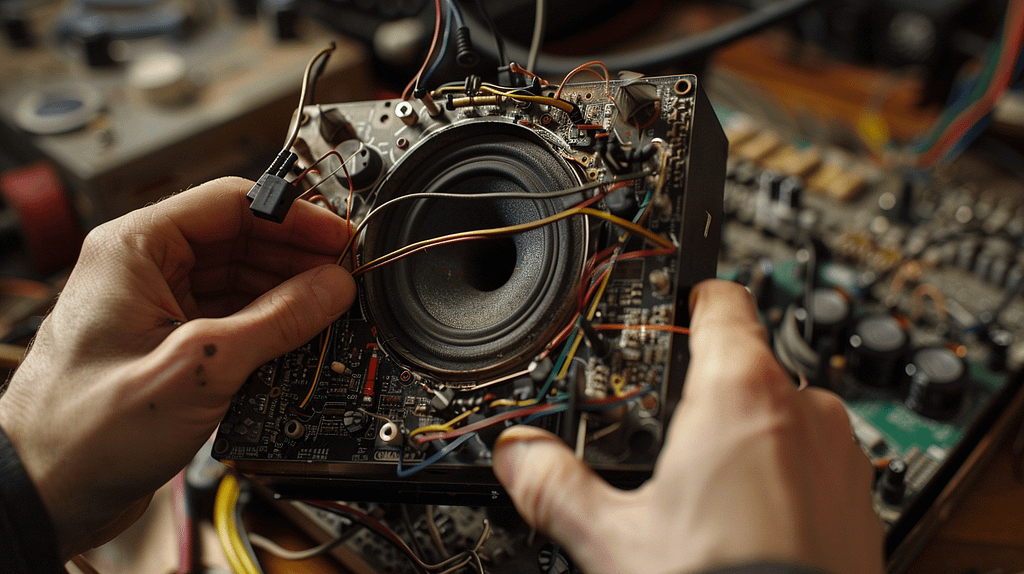
Revive your blown speaker by first identifying the issue—crackling may mean foam replacement. Prepare a repair kit, ensuring glue readiness. Cut off damaged foam and assess the damage extent.
Apply the glue and new foam, aligning carefully. Use a plastic scraper for excess residue. Finish with a thorough sound test post-repair. Successful repair hinges on proper kit preparation and glue application.
Remember, attention to detail is key for a fully functional speaker. Additional tips lying ahead enhance your repair proficiency.
Read Also: Fix My Speaker – Remove Water from Speakers in 1 min 14 sec
Key Takeaways
- Identify crackling sounds for potential foam surround replacement.
- Prepare repair kit with necessary items for successful repair.
- Apply glue evenly and align new foam for proper adhesion.
- Ensure proper alignment and let speaker dry before testing.
- Conduct thorough sound test to verify functionality and quality.
Identifying the Issue
If your speaker is producing crackling sounds, it likely indicates an important fix by replacing the foam surround. Speaker diagnostics involve troubleshooting issues like foam deterioration in older speakers, often seen in 15-year-old models.
The first step in the maintenance process is cutting off the damaged foam carefully.
This prepares the speaker for foam replacement. It’s vital to identify the extent of the damage to determine if the speaker can be fixed. If the voice coil is damaged, the speaker may be irreparable.
Understanding these key points in speaker diagnostics and foam replacement is essential before proceeding with the repair process.
Repair Kit Preparation
Prepare your repair kit by acquiring the necessary items for fixing your blown speaker, ensuring you have all the tools for a successful repair process. When you receive the kit, check the glue for any unclogging issues before application.
Use a plastic scraper to clean off any excess foam residue from the speaker. This step is essential to provide a clean surface for the new foam to adhere properly.
Ensuring the speaker is free from residue will help the glue bond effectively. By unclogging the glue and cleaning residue diligently, you set the stage for a smooth repair process.
Now that your kit is ready, you’re one step closer to reviving your blown speaker.
Application of Glue and Foam
Now that the repair kit is prepped and any excess foam residue has been cleared, it’s time to align the new foam and apply the glue for a seamless repair process.
Foam Alignment
- Reference the paper seam on the speaker for precise alignment.
- Guarantee even distance while placing the new foam.
- Press down firmly for proper adhesion.
Glue Application
- Apply glue evenly around the speaker’s edge.
- Use the provided paintbrush to clean up any excess glue.
- Allow the glue to dry by letting the speaker sit undisturbed.
Final Touches and Testing
Complete the repair process by using the outer foam piece to press down on the newly glued foam. Ensure proper alignment by centering the foam and checking for secure adhesion.
Let the speaker dry completely before proceeding to the sound test. Minor imperfections in alignment may not greatly impact the speaker’s performance.
After the glue has fully dried, conduct a thorough sound test to verify the speaker’s functionality and sound quality.
| Alignment Check | Sound Test | Additional Notes |
| Center foam | Check sound quality | Minor alignment imperfections acceptable |
| Secure adhesion | Verify functionality | Proper drying time important |
Once you’ve confirmed proper alignment and the speaker’s functionality through the sound test, your repair process is complete.
Frequently Asked Questions
Can Blown Speakers Be Fixed Without Replacing the Foam?
If your speaker cone is intact, repair techniques may bypass foam replacement. Explore DIY solutions like aligning foam carefully, applying glue evenly, and testing functionality post-repair. Restore sound quality effectively without foam replacement if possible.
How Long Does It Take for the Glue to Dry Completely?
The glue typically dries completely in 24 hours, ensuring ideal adhesion. If the drying process takes longer, check for excess glue or insufficient pressure during application. Alternative methods for quicker drying include using a hairdryer on low heat.
Is It Possible to Repair a Speaker With a Damaged Voice Coil?
You can’t repair a speaker with a damaged voice coil. Coil replacement or alternative voice coil options are necessary. Troubleshooting won’t fix this issue. Consider other repair options or seek professional help for a damaged voice coil.
What Should I Do if the Foam Doesn’t Align Perfectly?
If the foam doesn’t align perfectly during speaker repair, troubleshoot by gently adjusting the new foam for better alignment. Minor imperfections won’t greatly impact performance. Focus on the process, ensuring proper adhesion, and allow the glue to dry before testing functionality.
Can I Test the Speaker Before the Glue Is Completely Dry?
You shouldn’t test the speaker before the glue is completely dry as it may impact the repair. Adhering to safety precautions guarantees best results. Troubleshooting potential issues post-repair is advisable to secure the speaker’s functionality and sound quality.
Conclusion
Congratulations on successfully repairing your blown speaker! By following the steps outlined in this guide, you haven’t only saved yourself time and money, but also gained valuable repair skills.
Now that your speaker is back in working order, can you imagine the crisp sound quality and clarity you’ll experience once again?
Keep up the good work and continue to impress yourself with your newfound abilities!
